DR-200 Drive Recorder Firmware Version 4.4.0
Release Date 03/01/2019
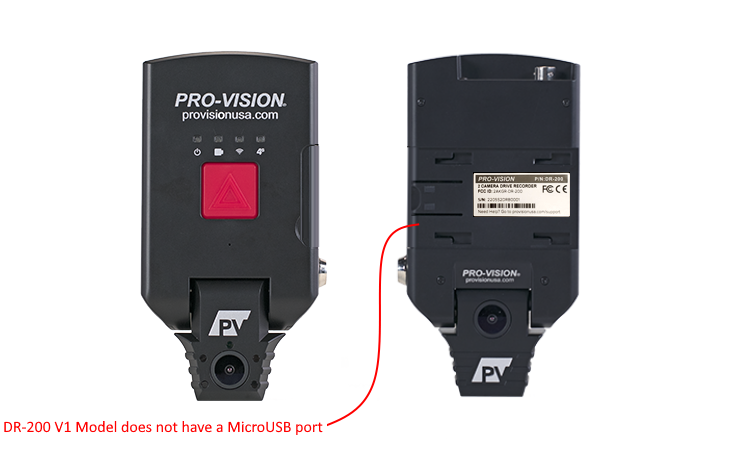
How do I know which model I have?
- The model number on the rear of unit is DR-200
- The serial number on the rear of the unit contains xxxxS2DRAxxxx
- The unit does NOT have a MicroUSB service port under the mount.
- The model number and serial number may be found in the 192.168.10.254 web page of the unit

What's New
New
- Added a "Camera Aiming Mode on "Live View" web page to increase refresh rate of cameras for aiming during installation
- Added "Vehicle Idling" feature to the "Trigger Settings" web page that triggers Alarm Recording if a vehicle stays idle (Ignition on and speed of 0 for a certain period of time)
- Added "Alarm Recording Override" feature to continue alarm recording and ignore the normal "Record Delay" timer value when the vehicle ignition is turned off
- Added a field to display the vehicle's current "Power Voltage Value" on "Power Settings" web page and in log file
- Automatically backup system configuration to file on storage disk
Changed
- Allow separate GPS "Coordinate OSD" and "Speed OSD" on screen display on/off feature on "GPS Settings" web page
- Changed network "Host Name" to use a dash "-" instead of underscore "_" to allow access by host name in a web browser
- Changed G-force feature to allow separate values for Acceleration and Braking on "G-Force Settings" web page
- Changed "Factory Reset" on "System Info" web page to reset all function settings as well as now also reset Unit ID and all network settings
- Moved "Overspeed" trigger feature to "Trigger Settings" web page
- Improved loading speed of live view and user interface
- Improved stability of file management system
- Improved stability of Dual Disk Mode
- Improved "Encrypt Video Files" interface in "Recording Settings" web page
- Prevent caching of web interface to remove requirement to manually clear cache (Ctrl+F5) after firmware update in future releases
Fixed
- Resolved LED indicators not powering off after DVR shuts down
- Resolved dark image on some cameras while night vision is on
- Resolved network share "Host Password" being removed by invalid input
- Resolved issue with audio playback of clips made through PRO-VISION Player
Update Instructions
Method 1: through web interface
- Download the firmware from the link at the top of the page to your device (smart phone, tablet, or laptop)
- Connect your device to the DVR unit’s Wi-Fi or LAN port
- Open a web browser on your device and navigate to 192.168.10.254
- On the DVR’s web interface navigate to Settings > System Info
- Enter your username/password for access (Default Username: admin / Default Password: doesitall)
- In the Update Firmware box at the bottom of the page press Choose File and browse to the downloaded firmware file on your device
- Press Upload to upload the firmware to the DVR unit and update the firmware
- The unit will beep twice when the firmware has been uploaded and begins applying to the DVR
- After the firmware update completes it will beep once as well as display the status on screen; the DVR will then reboot automatically.
Method 2: through a SD card
- Plug a SD card into the proper card slot on your PC
- Create a new folder named auto_upgrade in the root directory of the SD card
- Download the firmware from the link at the top of the page to the "auto_upgrade" folder
- Eject the SD card from PC
- a. If DVR is off with the SD card plugged in, firmware update will start automatically once the DVR powers on
- b. If DVR is already on, firmware update will start automatically once the card is plugged in
- Plug the SD card into the DVR that needs to be updated
- After the firmware update completes it will display the status and if successful it will reboot the DVR unit
NOTE
- If you were connected to the DVR through Wi-Fi, you may need to reconnect after the DVR unit reboots.
- After you have update the firmware it may be necessary to clear your browsers cache to allow it to load the updated interface, on Windows computers press CTRL + F5, on Mac computers hold Shift while clicking refresh on the page, and on smart phones you must go to Settings > History > Clear Browsing Data and select the 192.168.10.254 web page.
- All firmware releases after January 2018 contain an important security update as well as the additional login prompt used in step 5 above.
Saved Successfully
Error Saving (see console for details)