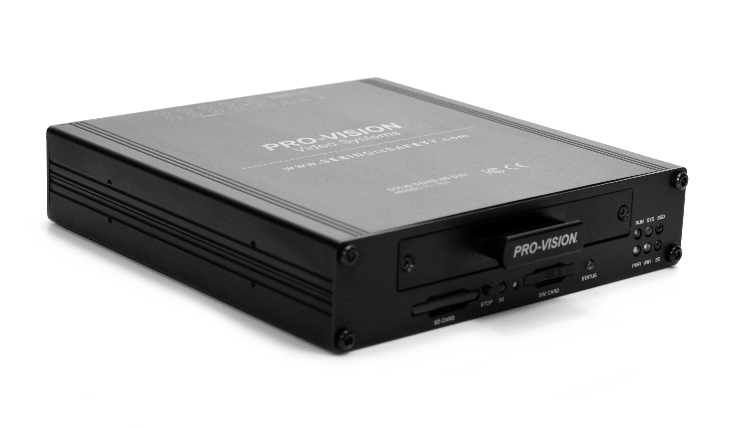
PD-1902 Ranger Hybrid DVR Firmware Version 1.7.21
Release Date 10/31/2023
How do I know which model I have?
- The model number on the top of unit is PD-1902
- The serial number on the bottom of the unit contains xxxxH9HDxxx
- The model number and serial number may be found in the 192.168.10.254 (Ethernet connection) or 192.168.1.254 (Wireless connection) web page of the unit

What's New
New
- System ignores Stop-Arm detection events for first 15 minutes after power on or vehicle speed exceeds 5MPH for first time. This prevents videos from being generated during the pre-trip inspection in the bus parking area. A note has been added to the stop-arm page on the DVR to reflect this as well. If the “Unit ID” is set to the default “PVVS” the stop-arm will work like normal at boot, allowing QC techs and installers to check the stop-arm without waiting 15 minutes.
- Added support to new 4G modem model/type (EC25-NA)
- Added 5 seconds to power off delay time to ensure proper shutdown if record delay and power off delay are set to same length.
Changed
- Default display output (SD and HD) mode set to cameras 1-8
- Disabled unused VGA output to reduce system operating temperature
- Disabled Telnet and enabled SSH for more secure advanced troubleshooting by engineering
- Add option to turn OSD on/off across all cameras on “Record” settings page
- Improve Stop-Arm camera recovery if signal interruption occurs
- Change default Wi-Fi SSID name to show serial number (instead of MAC), for example PV_RANGER_2207H9HD0012
- Change Stop-Arm OSD to show “SARM” when Stop-Arm is open and “V” when a violation is detected
- Improved Wi-Fi connection security
- Improved post firmware update verification to ensure system stability
Fixed
- Fixed issue where camera 10 (Stop-Arm) did not show on video output (SD or HD)
- Fixed issue where camera 10 (Stop-Arm) videos not being sent up during video requests
- Fixed issue where Stop-Arm Violation videos sometimes get sent to Alarm folder
- Fixed issue where time zone might not match options from the dropdown list on “Date/Time” settings page
- Fixed various web interface loading and refreshing bugs
- Fixed issue where SP version is not resetting the unit ID to “PVVS”
Update Instructions
Method 1: through web interface
- Download the firmware from the link at the top of the page to your device (smart phone, tablet, or laptop)
- Connect your device to the DVR unit’s Wi-Fi or LAN port
- Open a web browser on your device and navigate to 192.168.10.254 (Ethernet connection) or 192.168.1.254 (Wireless connection)
- On the DVR’s web interface navigate to Settings > System Info
- Enter your username/password for access (Default Username: admin / Default Password: doesitall)
- In the Update Firmware box at the bottom of the page press Choose File and browse to the downloaded firmware file on your device
- Press Upload to upload the firmware to the DVR unit and update the firmware
- After the firmware update completes it will display the status and if successful it will reboot the DVR unit
Method 2: through a SD card
- Plug a SD card into the proper card slot on your PC
- Create a new folder named auto_upgrade in the root directory of the SD card
- Download the firmware from the link at the top of the page to the "auto_upgrade" folder
- Eject the SD card from PC
- Plug the SD card into the DVR that needs to be updated
- The firmware update will start automatically once the DVR powers on, if DVR is already on, firmware update will start automatically once the card is plugged in
- After the firmware update completes it will display the status and if successful it will reboot the DVR unit
NOTE
If you were connected to the DVR through Wi-Fi, you may need to reconnect after the DVR unit reboots.
After you have update the firmware it may be necessary to clear your browsers cache to allow it to load the updated interface, on Windows computers press CTRL + F5, on Mac computers hold Shift while clicking refresh on the page, and on smart phones you must go to Settings > History > Clear Browsing Data and select the 192.168.10.254 (Ethernet connection) or 192.168.1.254 (Wireless connection) web page.
Saved Successfully
Error Saving (see console for details)